In today’s
tutorial we’re going to continue with the Horror Movie Special, and learn how
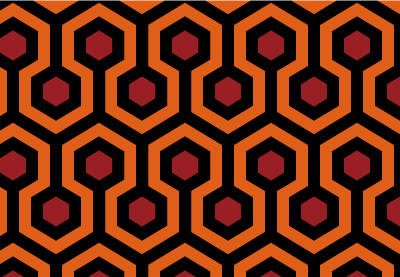
to create the trippy carpet pattern from Stanley Kubrick’s The Shining.
We’re going to create it in Adobe Illustrator using some “old-school” techniques, which involve the
careful handling of the Rectangle Tool combined with the power of the Pixel
Grid.
So, grab a cup of that hot coffee that you love, and let’s get started!
Oh, and don’t forget you can always find new
jaw-dropping patterns over at Envato Market, with tons of themes to choose from.
You can now follow this tutorial in video format over on the Envato Tuts+ YouTube channel.
1. Set Up a New
Project File
Bring up
Illustrator, and set up a New Document (File > New Document or Control-N) and adjust it using the
following settings:
-
Number
of Artboards: 1 -
Width:
602
px -
Height:
600
px -
Units:
Pixels
And from the Advanced tab:
-
Color
Mode: RGB -
Raster
Effects: Screen (72ppi) - Align New Objects to Pixel Grid: checked

2. Set Up a Custom
Grid
Since we’re going
to be creating the pattern using a pixel-perfect workflow, we’ll want to set up
a nice little Grid so that we can have full control over our shapes.
Step 1
Go to the Edit > Preferences > Guides &
Grid submenu, and adjust the following settings:
-
Gridline
every: 1 px - Subdivisions: 1

Quick tip: you can learn more
about grids by reading this in-depth piece on how Illustrator’s Grid System
works.
Step 2
Once we’ve set up our custom grid, all we
need to do in order to make sure our shapes look crisp is enable the Snap to Grid option found under the View menu, which will transform into Snap to Pixel each time you enter Pixel Preview mode.
Now, since we’re
aiming to create the pattern using a pixel-perfect workflow, I strongly
recommend you go through my how to create pixel-perfect artwork tutorial, which
will help you widen your technical skills in no time.
3. Create the Main Repeating Element
The first thing that we’re going to start
working on is the main repeating element, or rather section of the pattern,
that we will use to build our larger composition.
Step 1
Grab the Rectangle Tool (M) and create an 86 x 106 px shape, which we will color
using a bright orange (#DF5F18) and then align to the center of the underlying Artboard.

Step 2
Zoom in on the shape that we’ve just created, and use the Add Anchor Point Tool (+) to add two
new anchor points, one to the
center of its top edge, and another one to its bottom one.

Step 3
Use the Direct Selection Tool (A)
to select the anchors that we’ve
just created, and then push them
towards the top by right-clicking and
going to Transform > Move and
entering -26 px into the Vertical value field, leaving the Horizontal one at 0 px.

Step 4
Now that we have our main shape, let’s give it a top outline, by
selecting it, and then using the Move
Tool to create a copy at a distance of 14
px from it (right click >
Transform > Move > Horizontal: 0 px > Vertical: -14px >
Copy).

Step 5
Grab a copy of the original shape (Control-C)
and paste it on top of the one that we’ve just created (Control-F) using Pathfinder’s
Minus Front Shape Mode to remove
part of its lower section, coloring the resulting shape using black (#000000).

Step 6
Add the bottom outline, using a copy (Control-C > Control-F) of the one that we’ve just created, which
we will position right under the orange shape, selecting and grouping (Control-G) all three shapes together
afterwards.

Step 7
Using the Rectangle Tool (M) create
a 26 x 14 px shape, which we will
color using #981F24, and then Horizontal
Center Align to the Artboard, at
a distance of 50 px from the top
outline tip.

Step 8
Adjust the shape that we’ve just created by adding two new anchor points to its top and bottom
edges, and then individually pushing them towards the outside by 8 px using the Move Tool (right click >
Transform > Move > Vertical > – 8 px for the top one and + 8 px for the bottom one).

Step 9
Give the little hexagon a nice thick
outline, by selecting it and then going over to Object > Path > Offset Path and entering 12 px into the Offset value
field, leaving all the other options as they are.

Step 10
Change the outline’s color to something darker (#000000) in order for it
to stand out from the inner fill shape, and then select and group them both
using the Control-G keyboard
shortcut.

Step 11
Grab a copy (Control-C >
Control-F) of the hexagon and its outline, and position it onto the left
side of the repeating element, at a distance of 74 px from its tip, making sure that only its right half overlaps
it.

Step 12
Grab a copy (Control-C >
Control-F) of the second hexagon detail, and position it towards the right
side of the repeating element, making sure that only its left half overlaps it.

Step 13
Using the Rectangle Tool (M) create
a 12 x 62 px shape, which we will
color using black (#000000) and then center and position over the top hexagon
detail.

Step 14
Add the same 12 x 62 px rectangle (#000000) to the
other two hexagon details, only this time position it towards the top.
Once you’re done, select and group all the shapes that we’ve created so
far using the Control-G keyboard
shortcut.

Step 15
At this point
we’re pretty much done creating the repeating element. All we need to do now is
mask it so that when we start building the larger pattern, the pieces will fit
nicely together.
To do that, simply create an 86 x
160 px rectangle (highlighted with orange), which we will center to the
shapes that we’ve just grouped, and then use that as a Clipping Mask (right click
> Make Clipping Mask).

Step 16
Once we’ve masked our repeating element, we’ll want to align it to the
left side of our Artboard since
we’re going to create a couple of copies of it in the next stage of our
process.

4. Create the Main
Section of the Pattern
Up until this
point we’ve created the pattern’s main repeating element, which is great, but
we’re going to need to add a couple of instances in order to get it right.
Step 1
Select the repeating element, and then create eight copies of it (Control-C > Control-F) which we will
position 0 px from one another,
making sure to click on the original one to set it as our Key Object.

Step 2
Select and group (Control-G)
all the repeating elements together, centering them to the Artboard with the help of the Align
panel’s Horizontal Align Center option.

Step 3
Create five more rows using the one that we have, and stack them on top
of one another, making sure that their top and bottom outlines overlap. You can
make the process a lot easier by lowering the opacity of the copies so that you
can have a better view of the overlapping shapes.

Step 4
Once you’ve added all the rows, set their Opacity to 100%, and
then group (Control-G) and
vertically align them to the center of the Artboard.

Step 5
With the repeating rows in place, mask them using a 602 x 600 px rectangle so that the outward facing elements of the
pattern get cut in half.

5. Create the
Actual Swatch Pattern
So at this point we’re
all done working on the elements needed to create the pattern, which means that
we can turn it into an actual swatch library element.
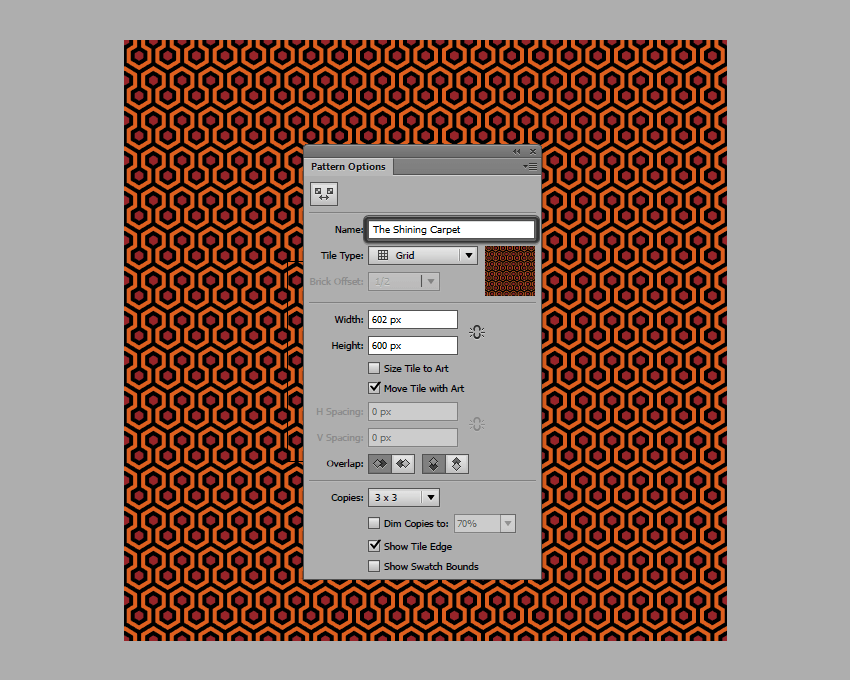
Step 1
Select the masked pattern, and then go to Object > Pattern and hit Make
which will bring up a new window with a couple of options which we will need to
adjust. But first, let’s give it a proper name to make it easy to recognize.

Step 2
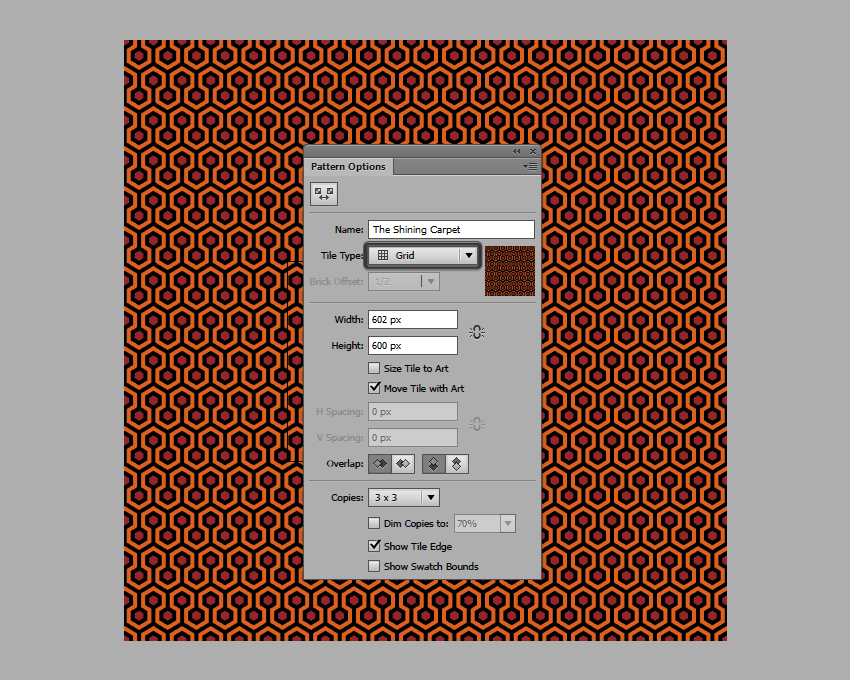
Next, we have Tile Type which
we’re going to want to leave set to Grid,
since our pattern elements are designed to be stacked together instead of being
spread out.

Step 3
Then, we have the Width and Height which
we are going to set using the actual size of our pattern (602 x 600 px).

Step 4
Leave the Overlap
and Copies settings as they are,
since they’ll work just fine, and then finally hit Done to add the pattern to your swatch
library.

Step 5
To use the pattern, simply select it from the swatch, and then grab the Rectangle Tool (M) (or any other shape)
and draw a new object, which as you will see will have that same trippy
brain-damaging effect as the real one from the movie had.

It’s a Wrap!
There you have it: an easy way to create your very own “Shining” carpet, using some basic
shapes and the power of Illustrator’s
built-in Pattern options.
I hope that you had as much fun as I did when I first created the
project, and most importantly learned something new along the way.

